Tuesday, March 26, 2019

Noteworthy Ways to Share Family History with Your Children

I have a passion for family history and genealogy. I love it in my bones, I tell you! And you know what? I have learned there are real benefits to teaching our family history and stories to our children. Let me share with you some of what I have learned.


Family History Knowledge Builds Self-Esteem


In 2013, I read an article at The New York Times titled "The Stories that Bind Us." It talked about two psychologists, Dr. Marshall Duke and Dr. Robyn Fivush, who conducted an amazing experiment.

It all started when Dr. Duke's wife, who works with special needs children, noticed that the children who knew a lot about their families did better when they faced challenges.

Intrigued, Dr. Duke and his colleague created 20 questions to test children regarding how much they knew about their family. Some of the questions were: Do you know where your grandparents grew up? and Do you know where your mom and dad went to high school?

Then, the Drs. compared the children's results to another set of psychological tests the children had taken and reached a conclusion. From the article, I will quote this part:

"The more children knew about their family's history, the stronger their sense of control over their lives, the higher their self-esteem and the more successfully they believed their families functioned."

Can you believe that? Isn't that remarkable?! So, how can you start sharing family stories with your children, you ask? I have some ideas!


Sharing Family History in Everyday Situations


I use every opportunity to tell my children, my nieces, and my nephews their family history in short little conversations. "Look kids!" I yell. "That's the house your aunts and I grew up in. I planted that small tree when I was in the eighth grade from a tiny, little sapling." Or, "Look kids! There's the school that caught fire when Aunt Chrissie was in the third grade. Someone was playing with matches in the coat closet."

In other situations I say something like, "You know, that reminds me of the time when..." There are so many opportunities throughout our day that we can share a family history story. We just need to start paying attention. And, if your kids are anything like mine, they love a good story!

Sharing Family History Through Music


This is probably one of my most favorite ways to share our family history. Let me give you a little background. My mother was raised Pentecostal. She and her brothers and sisters had a gospel singing group and would travel all over the South singing praises to Jesus!

Though the singing group was dissolved as they grew up and had families of their own, they would always get together for a singin' at Thanksgiving and Christmas at Grandma's house. That was one of my fondest childhood memories. Today, my sisters and I do that with our kids. I even learned to play the guitar just so we could do it like our aunts and uncles did when we were young!

It is so fun to hear the kids sign along to a favorite old hymn and to be able to tell them how much their great-grandma loved that song and why.

Sharing Family History Through Art


Several years ago, I decided to try to recreate every type of art my grandmother's had done. Embroidery, tatting, crocheting, painting, making crepe paper flowers, and that is just the short list! It continues to be something I enjoy doing.

As I learned a new skill myself and then taught it to my children, I had opportunities to tell them stories about grandma-so-in-so and why she loved to crochet or why Memorial Day meant making crepe paper flowers for the graves of long passed ancestors.

I love to display the things the grandmothers have made throughout the house. An old quilt, a teddy bear, or a pretty embroidered pillow case...it's fun to see things Grandma made!

Sharing Family History Through Pictures


I will admit, I am not big into traditional scrapbooking like I used to be. Now, I enjoy digital scrapbooking. But it was this hobby of pretty paper, stickers, and pictures that first peaked my interest in family history. I created volumes of old pictures and memorabilia that are now shared with the whole extended family. As the little ones look at the pictures, I tell them stories of their ancestors. Their faces light up and my heart melts a little.

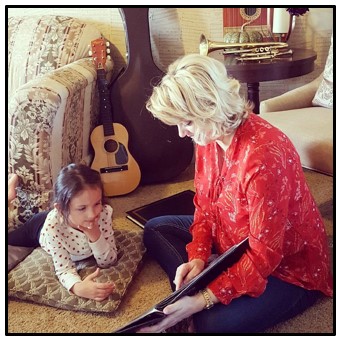
Kids are so stimulated by pictures. I noticed how the young ones got a real kick out of Grandpa being "a little boy"! So fun!

There are so many ways to share our family stories with the rising generation. What are you doing in your homes to share your family history? We'd love to hear your ideas in the comments below!

-Amie

Monday, March 25, 2019

4 Fun and Easy Ways to Journal

There are all sorts of reasons people journal. Maybe it's for future posterity, your mental health, or just because you enjoy it. Whatever the reason, as our lives get busy, time for journaling may go out the window! So, here are a few ideas of alternative ways to journal!

The Bullet Journal


This has been my go-to journal technique for the last few years. Essentially, it's a bullet list of the days events or thoughts. It might look something like this the image below.

A bullet journal doesn't require as much time as it does to write traditional paragraphs. Though not filled with great detail, this type of journal works well to jog your memory later. Though you may not have time to record all the details of some event or day, by writing down a few key words or a sentence, you will be able to recall it in the future.


The Picture Journal

I love this idea for little children, but it works for adults, as well. A picture journal is a collection of drawings that reflect the day's activities or a special event.

There are a few different types of picture journals I have seen. One friend of mine kept a picture journal of church services. While she was listening to the talks or sermons, she would doodle little drawings and keywords that spoke to her. Later, she could look up the scripture references she jotted down and use those words to brighten and enlighten her days.

I gave it a try, but didn't stick with it. However, I can see value in this unique way to journal, especially if you like to doodle!

The Calendar Journal


I think Brent Kavanaugh made this one headline news! The calendar journal is just that...a calendar with events of the day listed on it. It is sometimes kept on a paper calendar, but with today's technology, you could keep it on a digital calendar and then print it off or save it to a thumb drive. For a calendar journal, you might record so-in-so's birthday, a lunch with a friend at Cracker Barrel, a church meeting, or the kids soccer games. This type of journal may look something like this:


Another take on the calendar journal is what I have named the "to-do" list journal. I started keeping a small notebook where I write down all the daily things I need to do, want to do, and hope to do on one side of the page. On the other side of the page, I write down all the things that I actually did! It started out as a way to gauge whether I was being productive and where I spent the majority of my time, but I realized it was also a good way to record my life and what I was doing!

The Family Journal


I started my first Family Journal at the beginning of 2018. A family journal can be done several ways, but the method I used was this. Each Sunday, my parents, sisters, and their families would get together for dinner. Here we would share all the goings-on of our individual families. Then, when I got home, I would write it all down in the family journal.

Though I never considered it at first, it would have been a great idea to pass the family journal around and have others participate in the writing.

At the end of the year, it was my intention to have the family journal typed up and printed. I haven't done that yet (whoops!), but it's a great idea, isn't it?!

Making Time to Journal


There are literally dozens of ideas for how to record your personal history with journaling. You just need to do what works for you. Please feel free to share your ideas for keeping a journal and making the time to do so in the comments below. We love to hear from you!

-Amie

Will you come follow us on Instagram? You can follow all the happenings of The Fletcher Farmhouse at @thefletcherfarmhouse or you can follow just the homeschool inspiration at @littlelightofhomeschool.

Saturday, March 23, 2019

DIY: Appliqued Bunny Pillows

Spring has sprung and I am seeing bunnies, eggs, chicks, and flowers. I love everything about the Easter season...including decorating the home! I have always wanted pillows to match the changing seasons, but honestly, where do people keep all those pillows? So, I had a great idea! What if I made pillow covers that could easily be stored when not in use and quickly put on existing pillows to change up the home decor? Follow along as I share how I made these adorable pillow covers in just 2 hours!


What You Will Need

You will need 2 pillows, preferably the same size. Pick out a nice weight fabric for the pillow cover. In this case, I used a cotton canvas fabric in off-white. Next, choose a fun print for the bunny. This fabric doesn't necessarily have to be heavy. I have successfully used cotton, muslin, and even chenille.

If the fabric you choose for your cutout bunny is flimsy at all, I highly suggest purchasing some iron-on interfacing. This will give you added stability and a better overall aesthetic.

Go to Google or draw out your own bunny outline. Print and cut out the bunny to use as a template.

Be sure you have a tape measure, scissors for fabric, pins, matching thread, iron, ironing board, and a sewing machine. Here we go!

Step One

Measure your pillow's dimensions and add a 1/2 inch to each side. I like to add an inch and a 1/2 along the bottom so I have plenty of room later. (You'll see why!)

Using the measurements you just took, mark out a square on your heavier fabric. I like to fold the fabric and then cut the remaining three sides, but you can cut all four sides, if you wish.

Remember to square-up your square so it will not be crooked! I do that with a steel carpenter square.

Step Two


Lay out the fabric you have chosen for the bunny. Lay your pattern on the fabric and pin down well. Cut around the shape carefully.

Step Three


Assuming you need to add stability to your bunny cutout, open your iron-on interfacing and lay it across your table with the glue dots up. I like using HeatnBond, fuseable, lightweight interfacing.

Place the bunny (right side up) on the glue side of the interfacing. Pin down well and cut around it.

To adhere the iron-on interfacing to the fabric, you will need an iron. Turn it on a high setting and turn the steam off. Be sure to take the pins out of the bunny cutout, leaving the interfacing attached. It will stick to most fabrics because of its naturally rough texture. Place the iron on the bunny and press firmly for a few seconds. Move around until you have adhered the interfacing to the fabric bunny.


Step Four


Find the middle of the pillow cover fabric. To do that, fold it in half and half again. Mark the center with a piece of chalk. Do the same to the bunny.


Match the center of the bunny with the center of the pillow cover and pin down well. Now, it's time to sew!

Step Five


I prefer to set my sewing machine stitch on a medium sized zigzag, but you can use a decorative or blanket stitch, as well. Sew around the edges carefully. Trim any excess threads when done.

Step Six


With right sides together, pin the sides of the pillow cover together. Remember, you will want to leave the bottom open so you have a place to insert the pillow.


Here, I pop over to the serger and serge the seams together for a nice finished look, but you don't have to do that step. No one will see the inside seams of your pillow! If you do use a serger to sew the seams, I suggest going back over the seams with a straight stitch on the sewing machine. This will make the seam stronger.

Step Seven


Turn the pillow cover case right-side-out and press. Put the pillow insert in the pillow and whip stitch the bottom closed with some thread and needle. And, tada! You have a darling bunny pillow for Easter!


The Fletcher Farmhouse has entered into an affiliate relationship with Amazon. Clicking on links within this post may result in a commission being paid to The Fletcher Farmhouse at no additional cost to you.

Friday, March 22, 2019

Nature Studies for the Littles

Happy Spring, dear friends! We are thrilled to see the seasons change and to be able to fill our nature boxes and journals with more treasures. Here's a little bit about the nature studies program we use and a couple special activities that have become a favorites.

Nature Journals & Scavenger Hunts


We are blessed to have a wooded area filled with nature's treasures on our property. As we walk through the little paths we've created, the girls scoop up seed pods, acorns, leaves, flowers, moss covered bark, and the occasional bug. Everything they find is a treasure to them and I am left to figure out where we are going to put all of it! Hello, nature boxes! Yes, we have a lot them, but I adore how much the girls love to pull them out and ooh and aah over each special find.

We used several of the nature related units from The Good and the Beautiful. I was so inspired by them! The pictures were delightful and the message and information was spot on.

One of the inspirations I received was to create a scavenger hunt. Our first nature scavenger hunt was a big success. The girls were particularly engaged and excited. Each girl got her own egg carton and a card with 12 items to find. As they scoured the ground, they soon found each of the items on the card. [I made sure to make the cards with pictures of things I knew we had a lot of!] Then, we rushed to the school room to put all their finds in the natural journals. [Here is a similar style notebook that I bought, here.

Before we got started recording in our nature journals, we laid out everything on the table and grabbed our nature book to see if we could identify what each item was named. The girls painted or drew a picture in the nature journal for each treasured find. The two older ones copied the name of the item for their writing practice, too.

Because our scavenger hunt was such a hit, we do them regularly now. Like when our Arthropod Unit arrived (also from The Good and the Beautiful) and we found that scavenging for dragonflies in the pond was the perfect time to search for minnows, flies, nymphs, and tadpoles, too!

Nature Collages


Our little unit on bees and wasps was just what we needed. Suddenly, bees were no longer scary but something exciting to observe! We completed the assignments from our The Good and Beautiful curriculum, made watercolor bees, constructed a little hive from construction paper, checked out ALL the books on bees and wasps from the library, discussed the Be Attitudes, and made a life cycle craft. Each day, we made it a habit to add something to our collage. When the unit was completed, we enjoyed chatting and reminiscing about all we had learned! Collages are a fun way to display your homeschool work!

What Studying Nature Means to Me


I am so thankful for a testimony of God's creations. This is such a beautiful Earth we live on! Admiring nature has always brought me a greater appreciation for the loveliness around us and I want to share that with my girls. Studying nature is one of my favorite ways to teach and share about God's love for us.

-Andrea

Andrea's Favorite Things for the Schoolroom:


The Fletcher Farmhouse has entered into an affiliate relationship with Amazon. Clicking on the links above may result in a small commission being paid to The Fletcher Farmhouse at no additional cost to you.

It's Time for Baby Chicks!

It's spring at The Fletcher Farmhouse and the farming stores are full of poultry! It's time for baby chicks and we are excited! We're sharing with you what we buy, why, and how we care for these little feathered friends.


What We Buy & Why


Let's start with my favorite, the Plymouth Rock Chicken. This spotted beauty is great for meat or laying eggs, but I have only ever used them for the brown eggs. They are my absolute favorites to see walking around the hen-house because of their unusual speckled look.

My next favorite are the Ameraucana chickens. Though I don't find them more attractive than another type of hen, their eggs are a bluish green color, which I love. We recently got a couple of Ameraucana bantam hens (I refer to them as "banties") and we get little bluish green eggs that are absolutely adorable. My friends get a kick out of me presenting them with these tiny beauties!

The Leghorn Chicken is one of our relatively new breeds. We only have one and she is a GIANT compared to the other chickens. She is kind of the brute of the hen-house. She lays a light brown, large sized egg. In fact, her eggs don't fit in the standard egg carton. She is by far our best producer of eggs. Leghorn chickens are also bred to do well in colder temps which is good considering the frigid temperatures we had this past winter!

How We Care for the Baby Chicks


When we first bring our baby chicks home, they stay in the house and in a warm place. We put them in a special wooden box my husband built and place it in the mudroom. We had to add a wire cover to keep out unwanted "friends" (the cats).

It is important that the new chicks have both a place to warm themselves and cool off when necessary. For this reason, we put a small heat lamp on one side of the box. On the other side, we have the water and food containers.

Cleanliness is super important, especially as they start getting a bit bigger. The smell is pretty intense if you leave the box unattended, especially if you have several hens. We use wood shavings from the pet store to line the box. These shavings get dumped and exchanged about every four days. My husband thinks that is a little too soon, but I just can't stand the smell! Yuck!

You also need to make sure the water and food stay clean. As the baby chicks start moving around more and especially when they get a little bigger, you may need to clean the food and water trays daily.

It is just fine to pick up and hold your baby chicks, in fact, I recommend it. We wanted to be able to catch our chickens with ease, so we held them and pet them a lot when they were chicks. My husband even trained one of the Bantam roosters to sit on his shoulder like a parrot!

How We Move the Chicks to the Chicken Coop


At about the age of 8 weeks, we move the box to the garage. This is a sheltered area, warmer than outside, but still helps them acclimate to the outdoor temps. They stay here for about 4 more weeks.

Then, it's time to move them to the chicken pen. They are still rather small and will be picked on by the older "ladies." We put our new chickens in a small, temporary, gated pen and place that pen near the chicken-house. Within a few more weeks, the new chickens are ready to be introduced into the chicken-house with the older hens.

What about you? What are your best tips for raising chickens? Please leave us a message in the comments below!

-Amie

Cut It Out! The Importance of Learning Scissor Skills

It's a sad state of affairs when you bring a group of girls between the ages of 12 and 18 and more than half of them can't cut a straight line! Friends, learning scissor skills as a child is really important. Here's why.

Scissor Skills Help with Coordination

Learning to use scissors properly is a fine motor skill. Like using a pencil or crayon, the user must hold the scissors properly and manipulate them just so to have the desired result. Children exercise their tiny hand muscles as they open and close the scissors and learn important coordination skills at the same time.

Cutting helps with eye-hand coordination because it requires the eyes to track the movement of the scissors along the line. Bilateral coordination is also needed to be skillful at using scissors. For example, one hand will need to hold and turn the paper while the other hand works the scissors.

Motor planning is another aspect of using scissors. North Shore Pediatric Therapy says this about motor planning:

Motor planning is the ability to conceive, plan, and carry out a skilled, non-habitual motor act in the correct sequence from beginning to end. Incoming sensory stimuli must be correctly integrated in order to form the basis for appropriate, coordinated motor responses. The ability to motor plan is a learned ability which is generalized to all unfamiliar tasks so a child does not need to consciously figure out each new task he or she faces.

As children practice scissor skills, they are exercising many key components to their learning and development.

How to Teach Scissor Skills

First, you need the right pair of scissors. I like Fiskars because they can be purchased with a blunt tip which is safe for beginners.

You may want to mark the thumb hole on the pair of scissors. You can put a little dot of nail polish or paint to help your little one remember which hole the thumb goes in! Remember, the thumb hole is always pointing upwards.

Cutting cardstock is a good way to start. Cardstock will have a bit more stability than regular paper. Begin by having your child cut along thick, straight lines. After they begin to feel comfortable with cutting a straight line, try curves and wavy lines.

After cardstock, try other mediums such as regular paper, tissue paper, or even fabric! [Need an extension activity for older kids? Consider learning to cut out a pattern for a pair of jammy pants or other fun sewing project!]

Lastly, try having your little ones cut out some simple shapes. Make sure the shape is rather large in the beginning. I suggest circles, triangles, and hearts. Keep using cardstock, if needed. You want these new learners to feel successful!

Your Thoughts?

How about you? What activities have you used to teach your little ones scissor skills? How about teaching scissor skills with the older kids? Another idea for the older ones might include making snowflakes or learning the German Art of paper cutting called Scherenschnitte!

I love to hear from you, my dear friends! Please share with me your super-scissor-skill teaching ideas in the comments below!

-Andrea

Tuesday, March 19, 2019

Two Ideas for Communicating with Non-Verbal Children

For many years, my autistic child was non-verbal. Having studied special education in college, I knew how vital language skills were to a growing child. Whether he would ever speak or not, he needed a way to communicate his needs and thoughts now. Here are two ideas you might consider for communicating with your non-verbal child.


Using a Signed Language for Non-Verbal Children


Before our son was diagnosed with autism, I was a sign language interpreter for Deaf children. With that background, it was easy to integrate a signed language system into our home. There are several types of signed languages. ASL is American Sign Language and the language used in the Deaf community. SEE is Signed Exact English and is often taught and encouraged for deaf children living in hearing communities. And then there is CASE which stands for Conceptually Accurate Signed English. This is what I used with my son because after all, he was a hearing child.

I would teach him the sign for "cracker." Then I would sign, "You want cracker?" while speaking the words "Do you want a cracker?" When he would grunt or shake his head yes, I would show him how to sign "Cracker, please" and wait for him to sign it back to me. Depending on your little one, you may choose to just teach them the sign for "cracker" and wait on the "please"!

Modifying signs might be appropriate for tiny hands with less than ideal dexterity. That is okay, just make sure it is something similar to the correct sign and something you use consistently.

Using PECS for Non-Verbal Children


PECS stands for Picture Exchange Communication System. My son began using this option at his first preschool. Personally, I did not like it. By this time, he could sign over 50 words and using the pictures was just an added frustration to him. However, I did see value in this option if it were used to begin with.

Using the PEC System is a way to teach a child to communicate with someone by handing them a picture of what they want. These little pictures should be laminated for use because they will get dirty and get a lot of wear and tear.

Some pictures you might consider using are for favorite foods, potty, favorite toys, and emotions such as sick, happy, sad, and mad. You can find many free printable PECS pictures online. Here is a list I found at AutismSupport.org. Click here to see an example page.

For more information on using this system, see this amazing article here.

Your Thoughts?


What about you? What ideas and strategies have helped with your non-verbal child? We would love to hear your experiences in the comments below!

- Amie